XSplit - Storm Streaming Server
In this tutorial, you will learn how to configure XSplit Broadcaster software with Storm Streaming Server. XSplit Broadcaster is one of the most popular real-time streaming encoders on the internet. It is functionally very similar to OpenBroadcaster, but it offers a range of options not available in its competition.
Video Tutorial
Connection Setup
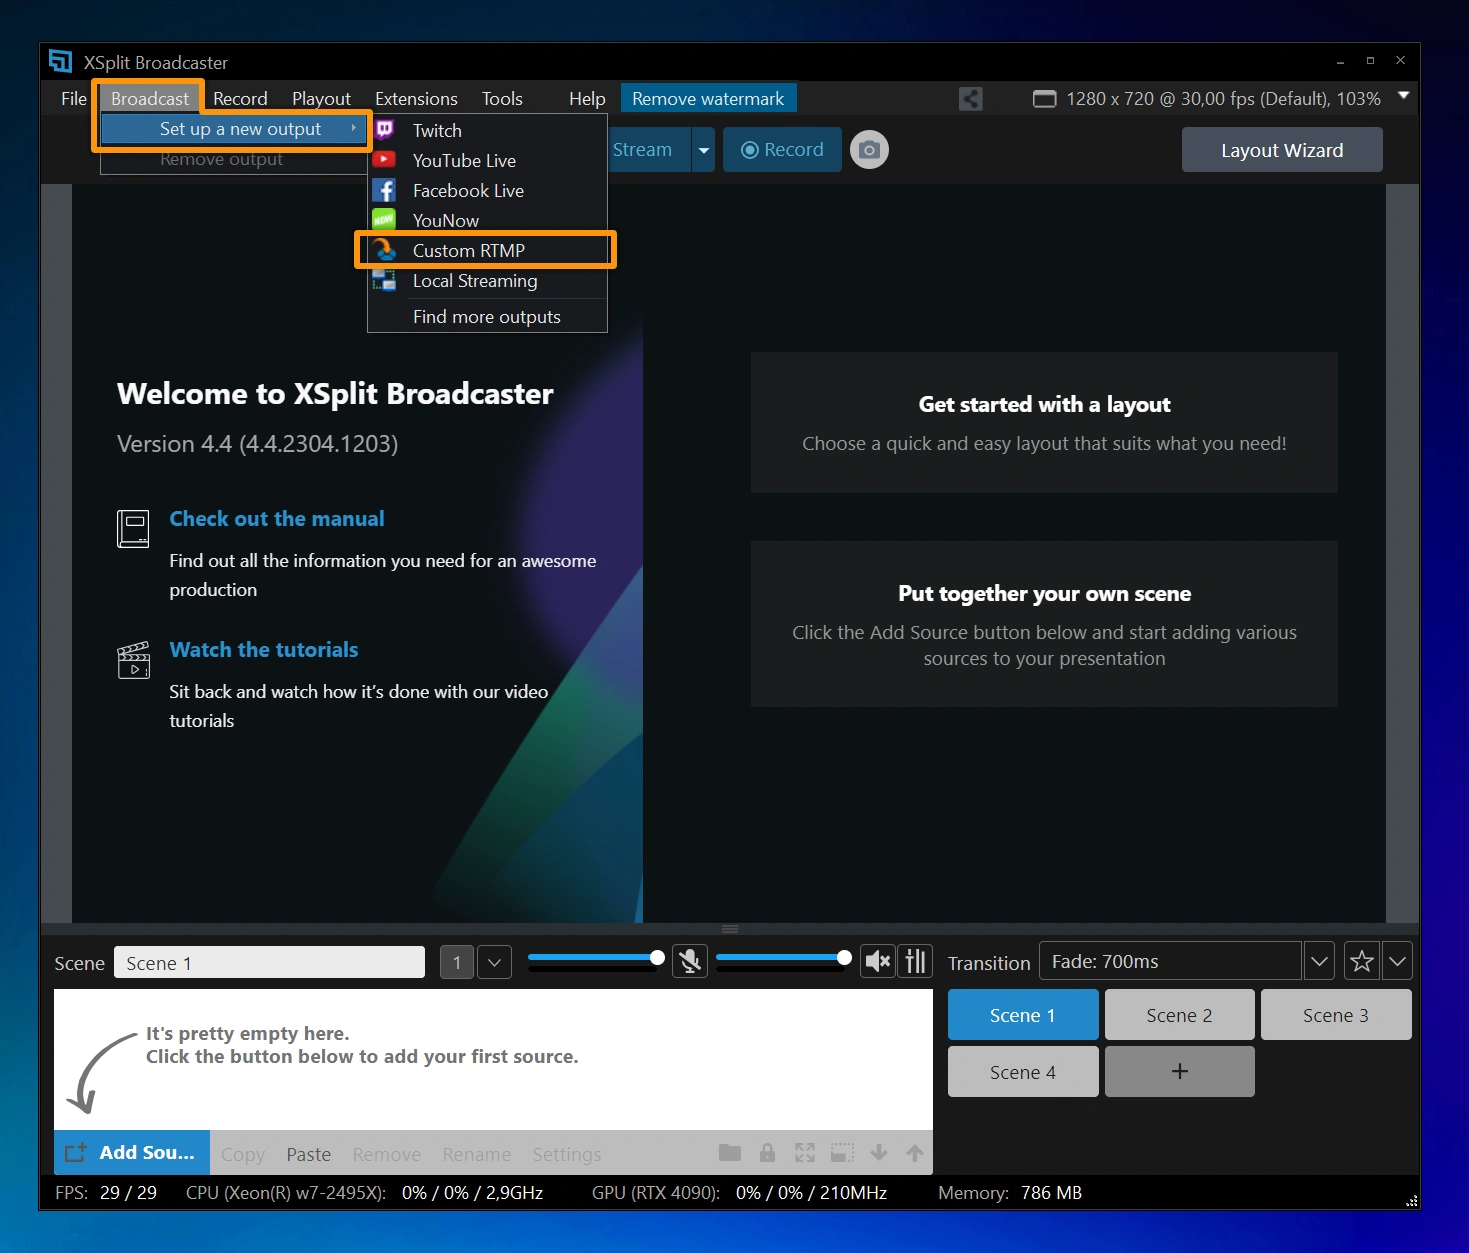
To connect XSplit to the Storm Streaming Server select Broadcast from the top menu, then choose Set up a new output, and then Custom RTMP.

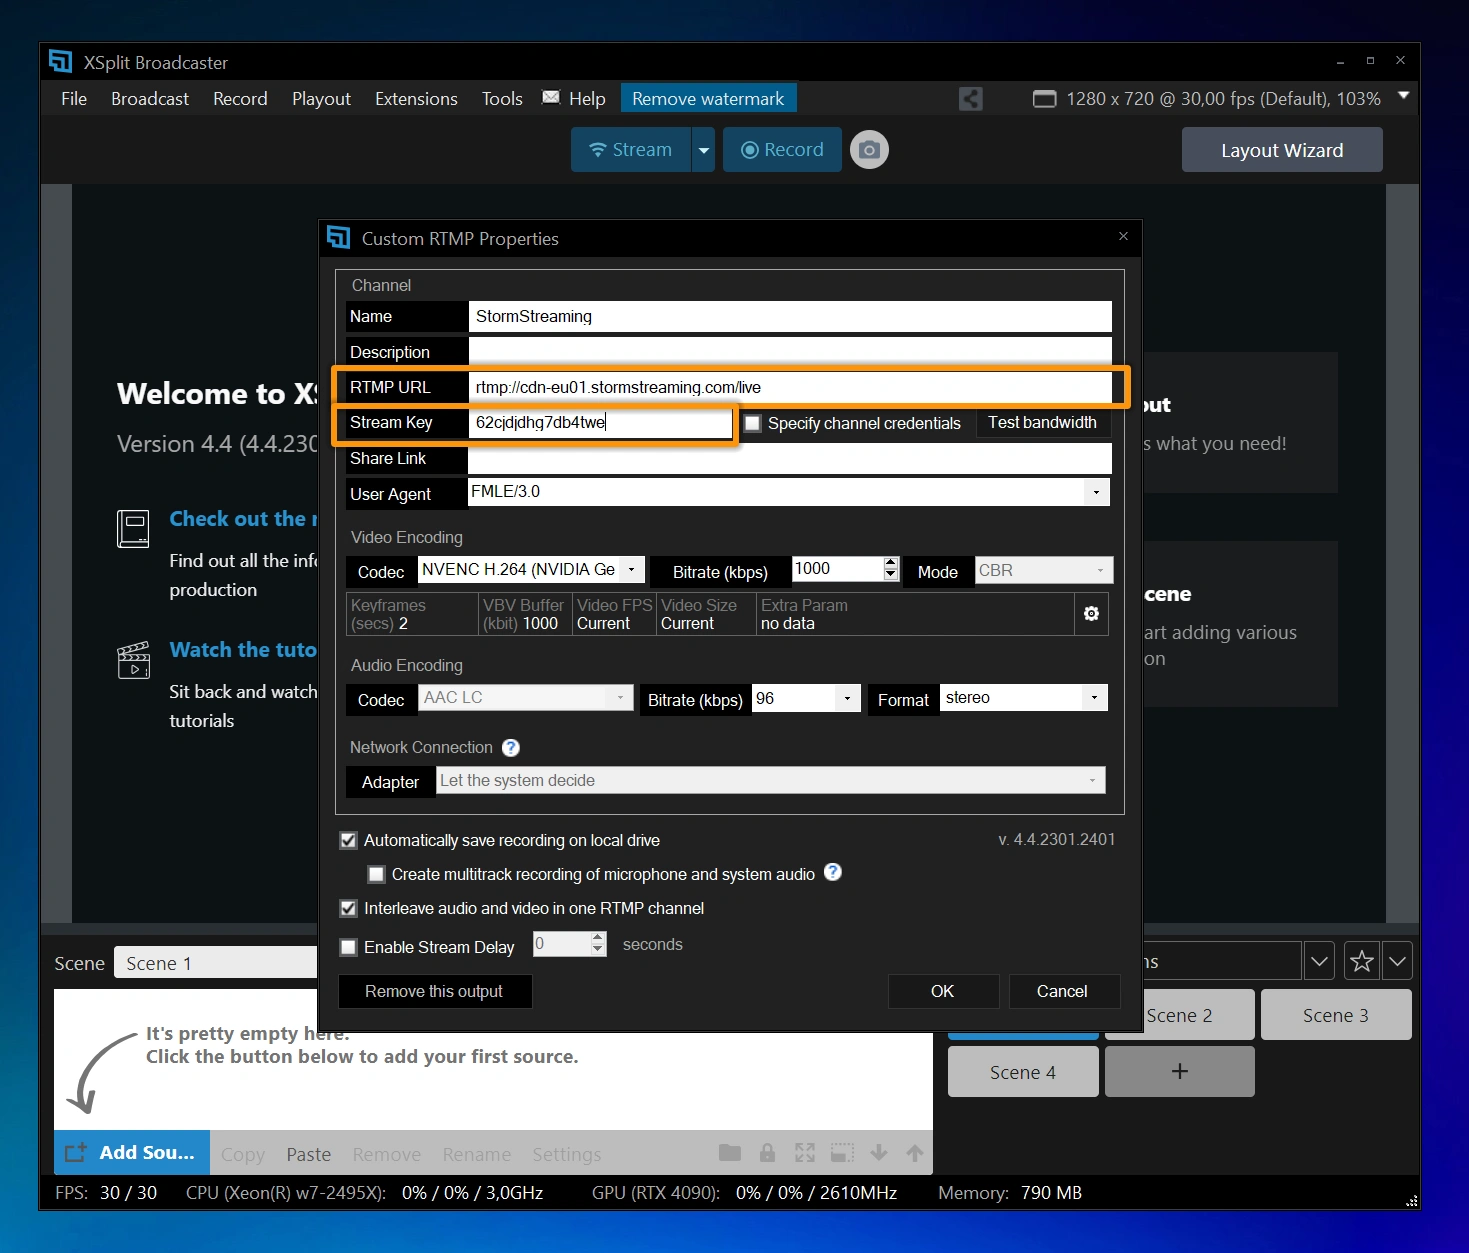
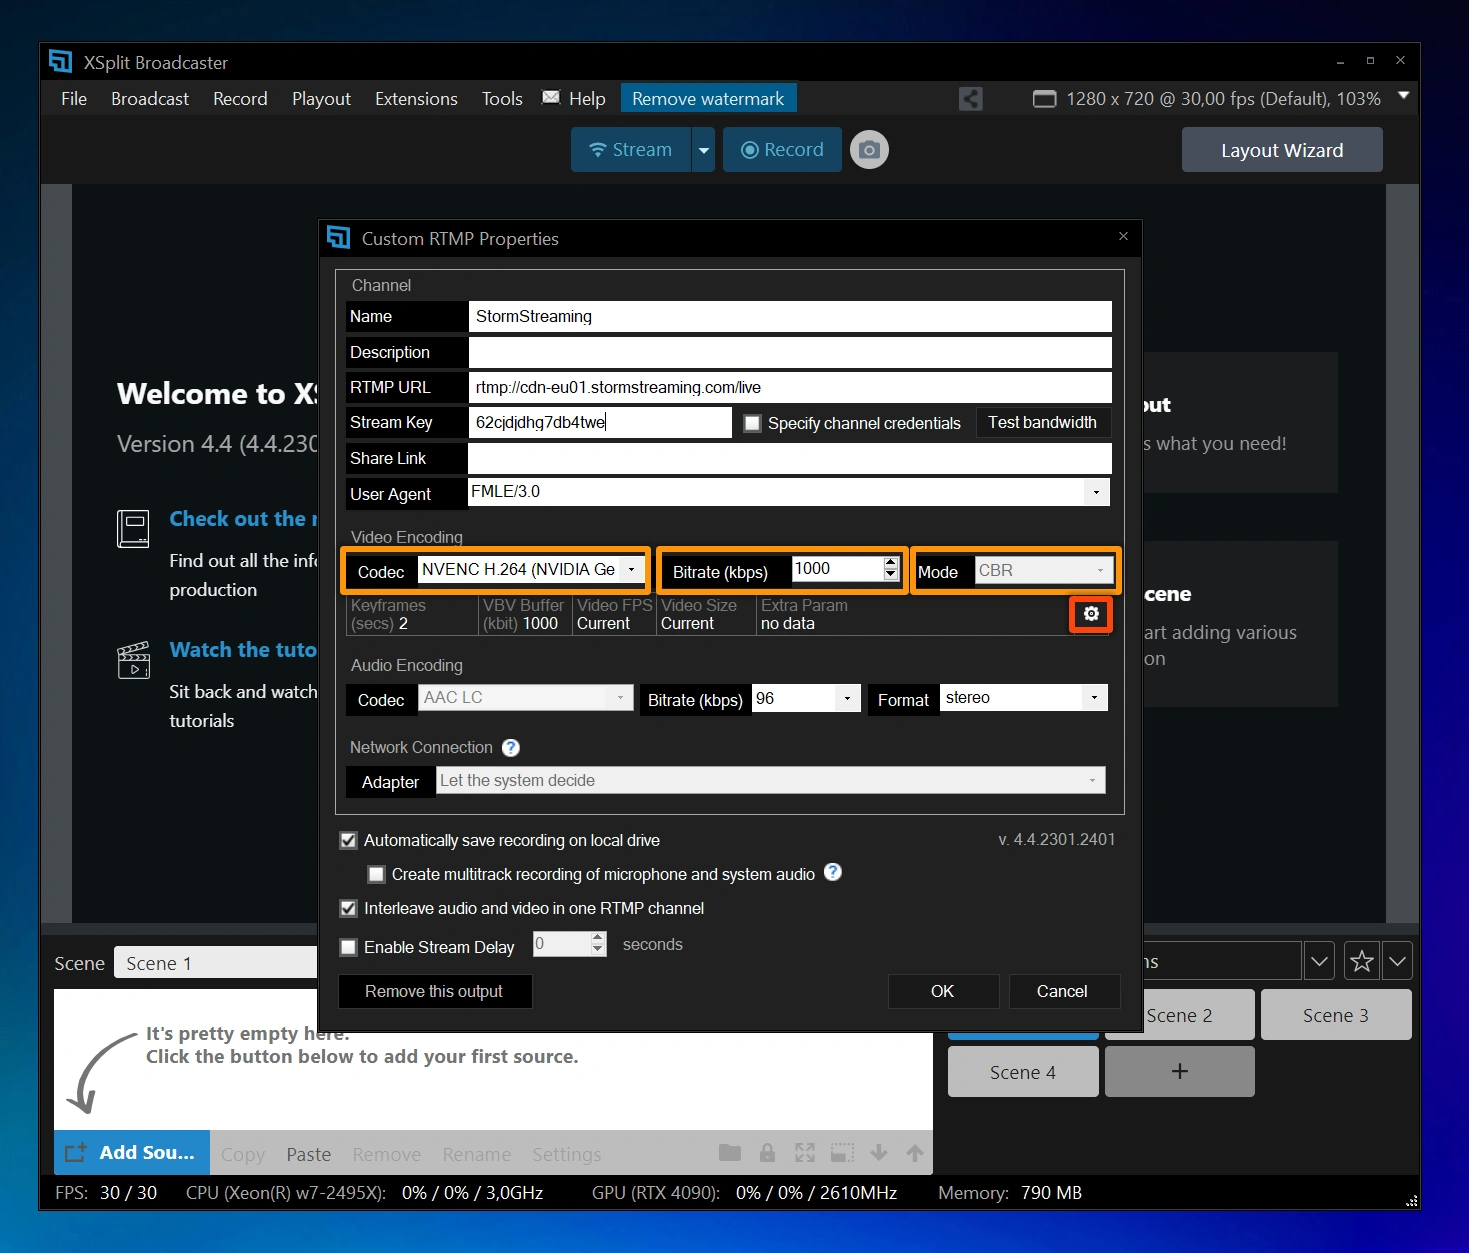
A popup window will appear with a list of connection settings. In the Name field, you can enter any name you like, such as StormStreaming Server. Next, you need to enter the link to your server in the RTMP URL field. The address should start with the protocol name "rtmp://" and end with the application name (by default in Storm Streaming Server we always have one application named "live"). Below that, you will find the Stream Key value.

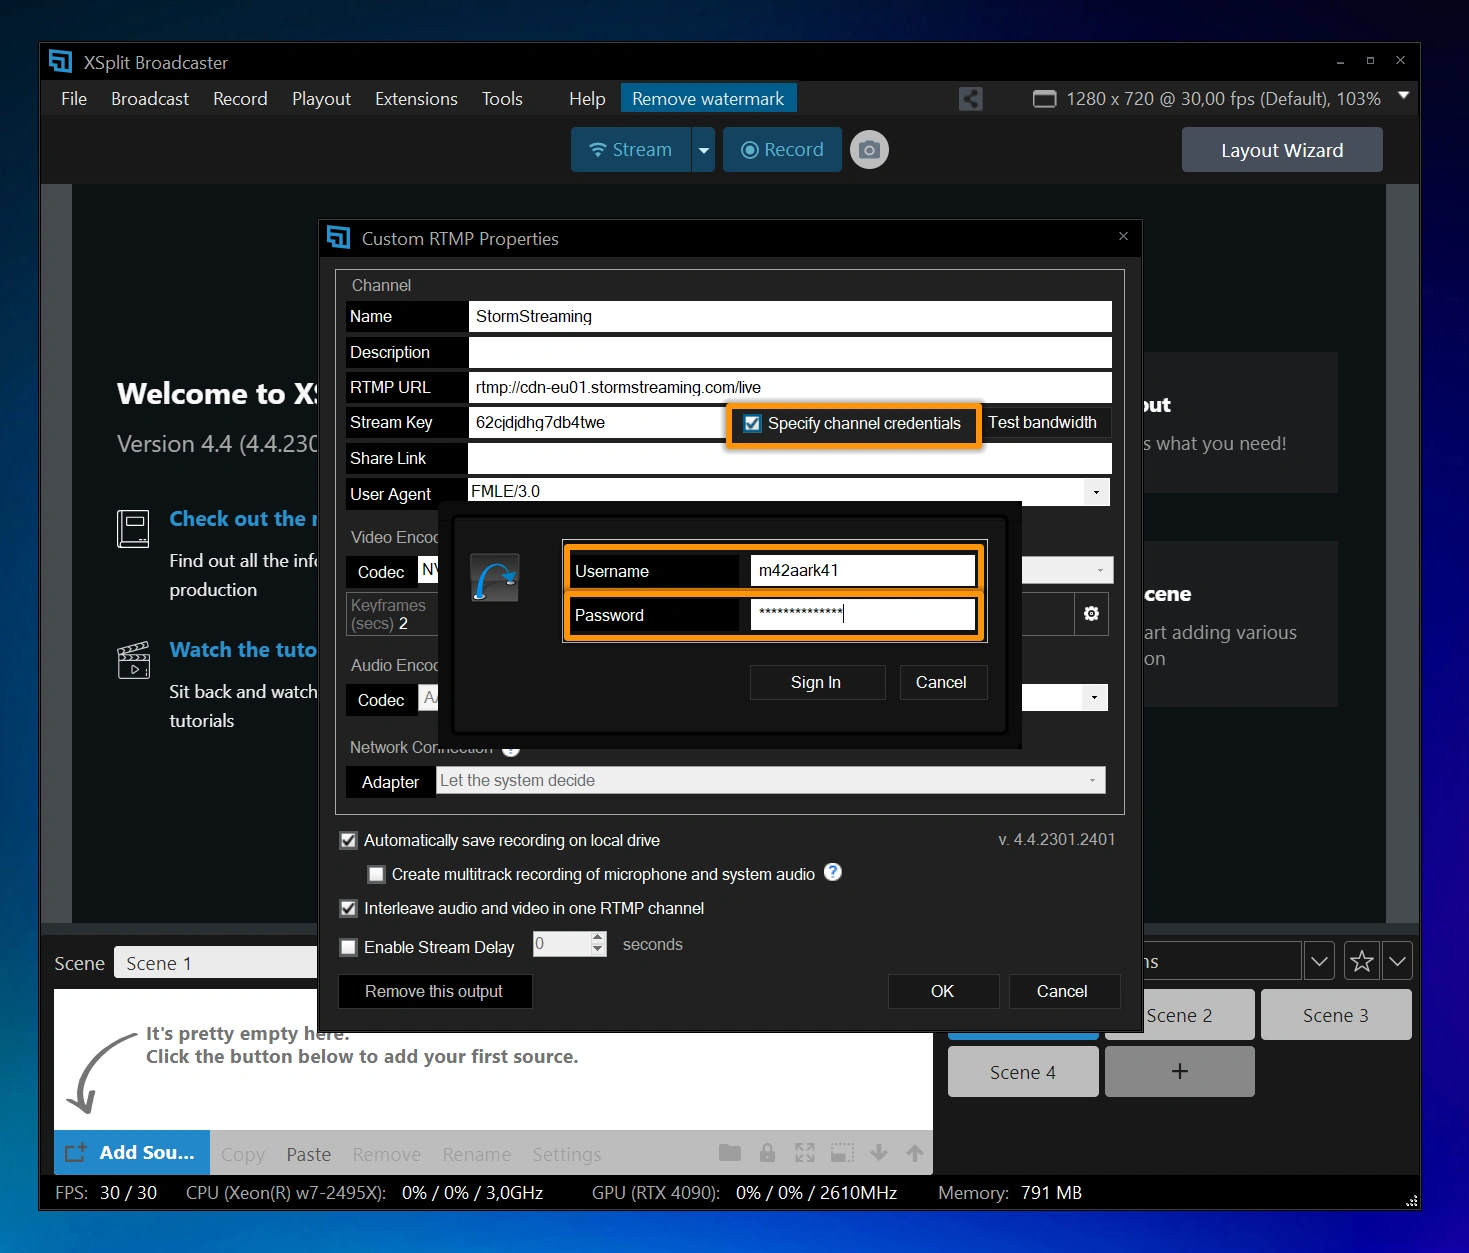
If you have enabled authentication for your streams in Storm Streaming Server, you will also need to provide your Username and Password. To do this, select the Specify channel credentials option, and in the next popup window, fill in both fields.
Encoder Setup
Now it's time to select a proper video encoder. The recommended choice here is x264, but if you have a NVIDIA graphics card, you can try NVENC. The selection of the appropriate bitrate depends on the chosen resolution. Below is a quick reference guide:
| Resolution | FPS | Bitrate |
|---|---|---|
| 1920x1080 | 60 | 6000 |
| 1920x1080 | 30 | 4500 |
| 1280x720 | 60 | 4500 |
| 1280x720 | 30 | 3000 |
More detailed settings are available under the gear icon. Clicking on it will bring up another popup. Here, set the Max Keyframe Interval to 1.0 and the Encoder Preset to ultrafast.
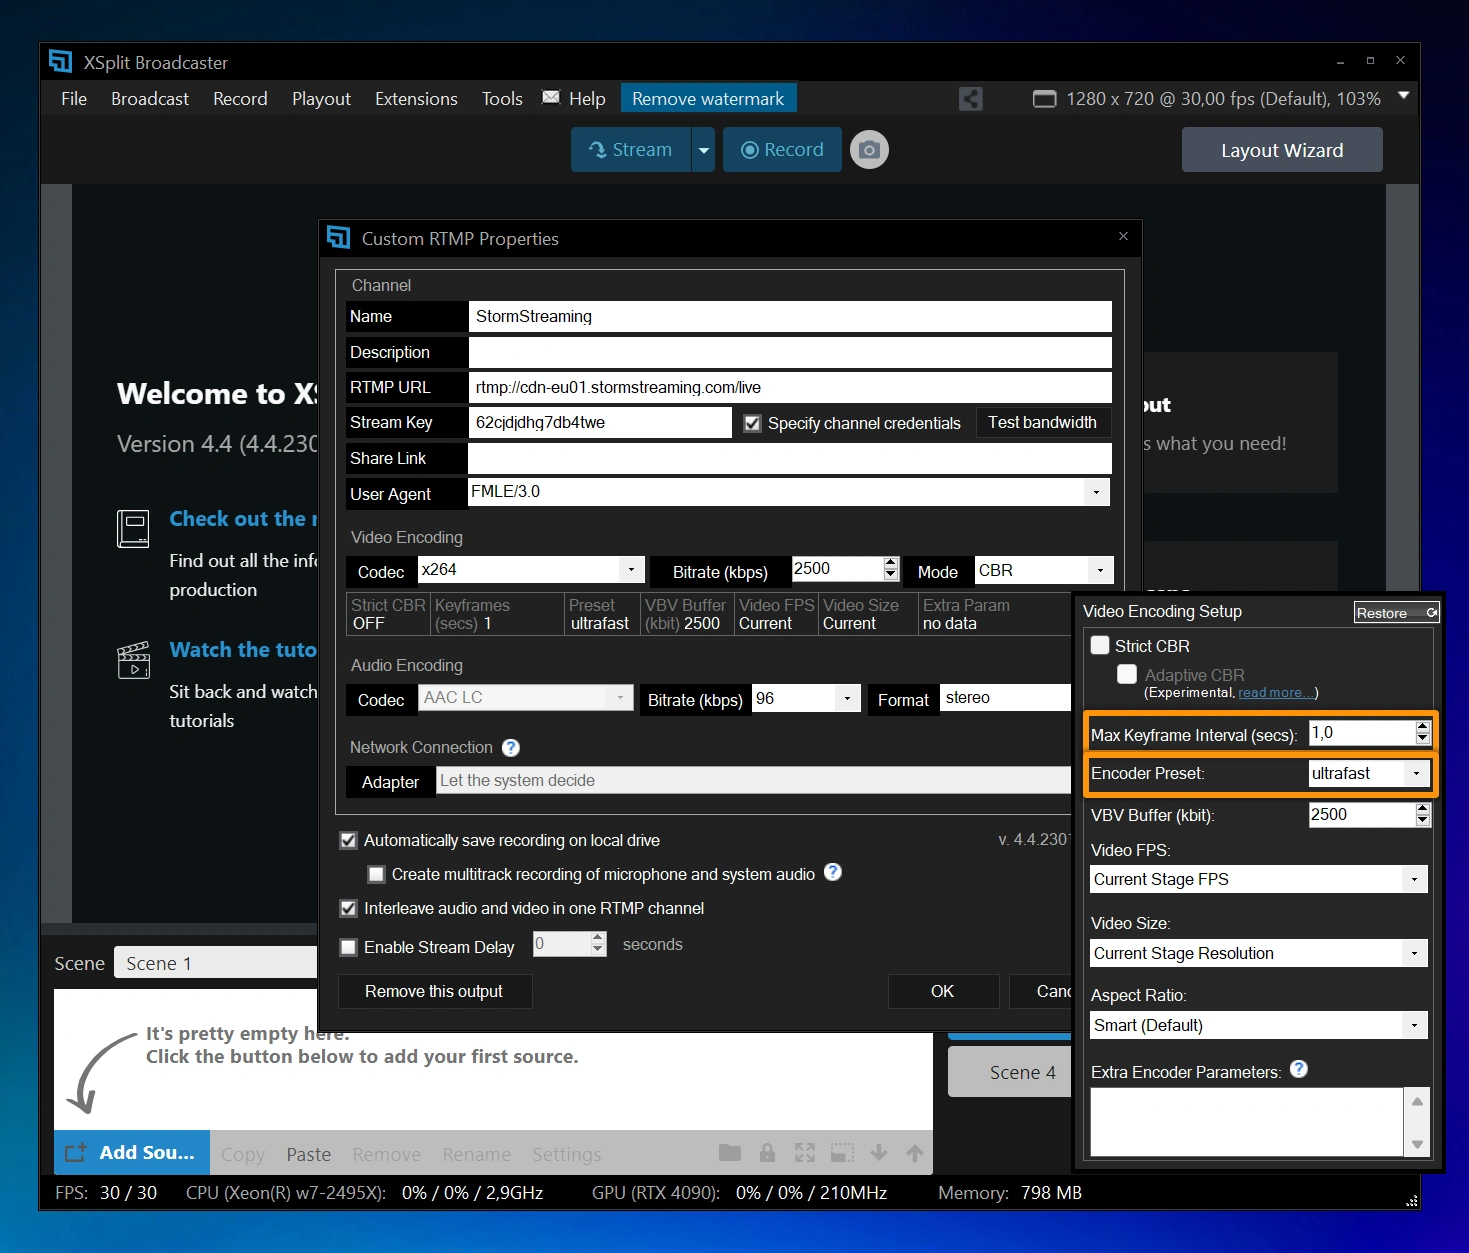
After making all the changes, click OK, and you're ready to start your stream.
If you have any questions or need assistance, please create a support ticket and our team will help you.